
There is a lot of confusion out there on the internet when it comes to the medical side of prepping, shooting, and survival. In this article, we’re going to deep-dive into one single item; a blow out kit.
- What is a blowout kit?
- Who needs one?
- Where do you keep it?
- The difference between a blowout kit and an Individual First Aid Kit (IFAK),
- Should you buy one or make one?
- How to make your own blowout kit.
WHAT IS A BLOWOUT KIT
If you’re a suburban housewife (do those still exist) or a millennial that’s looking for how to repair the tires on your Tesla, you might have landed on the wrong article. A blow out kit is described by both its function and its design in the tactical world.
The term comes from the military world, and actually IS related to the same idea as blowing a tire. Certain kinds of injuries have a severe risk of causing a blowout. If you’ve ever had one in a car, you know the difference. If you’re just losing air, you can get to a station to get it fixed. Well, if you’re just bleeding, you can get to a doctor to get it fixed. But if you have a blowout, you lose (or could lose) all your really important red stuff in a matter of seconds.
Simply put, a blowout kit is medical kit solely for the purpose of stopping massive severe life-ending blood loss as rapidly as possible. Gun shot wounds are certainly high on the list of things that can cause this kind of injury, but so are impaling injuries, falls on a sharp object, mishaps with a bladed instrument, and any other injury that can cause you to bleed out before any modern medicine can intervene.
WHO NEEDS A BLOWOUT KIT?
Firearm enthusiasts shooting at the range, soldiers on patrol, police officers, fire rescue personnel, and anyone who has the mindset of remaining ultimately prepared can probably find a darned good reason to have at least one of these with them. I am a firearm instructor. I’ve spent every day for the last decade with a blowout kit, IFAK, and a trauma bag with me at just about all times. I’ve never had to use more than a band aid from the IFAK in all those years, but… not having one on me the moment I need one would mean the end of my life, so I’d rather hedge my bets and carry one. In today’s world I could also say “I travel the roads” as enough excuse to need something like this. The world has become a crazy place and being prepared to save yourself or someone else is never a bad thing to be.
WHEN TO USE ONE
A blow out kit is designed to keep your blood inside you and stop you leaking all over the ground. Got it? A first aid kit (IFAK) doesn’t do that. This is a single-purpose mission-specific piece of equipment and when you need it, you need it right then.
My old firearm instructor used to reference this time frame as “RDN” or “right-damnit-now.” Assuming you’ve been seriously wounded, shot, stabbed or otherwise are leaking life-flavored-Gatorade all over the ground, you or someone near you needs to be able to grab it within seconds. Ideally you’ll have someone with you in a situation like this, but you may be alone. With that in mind your blowout kit isn’t something you carry in your bugout bag. It’s not in your trunk. In an ideal scenario it’s on your person when you are most likely to need it.
WHERE TO KEEP IT
There are two categories that come to mind when I personally think of needing a blowout kit. One of them is a gunfight. The other is “every other time.” Sounds maybe a little single-minded, but each person will be different. I know my scenarios. I’m not likely to be hiking Mt Everest and fall and shatter my femur on a cliff face and have to perform self-triage while hanging by one of those rockface spiky things 800 feet over a ravine. I’m just not. If I were thinking that was a likely scenario for me, then honestly, I’d probably keep it the same place as I would when thinking of the gunfight mindset.
If you’re reading this and you have the resources available, ask your friends that are swat officers. Ask your friends in special forces. Ask your your fellow shooters that train seriously. Don’t just take my word for it. Every single one of them is likely to answer you the exact same way. It’s either in a cargo pocket, or it’s on their battle belt.
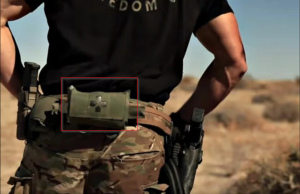
If you’re approaching prepping from a tactical mindset, then your blowout kit is on your battle belt, in the rear, directly above your butt in a place you can reach with both hands.
Why is it on the rear of your battle belt? Simple, as a tactical instructor recently told me from his point of view – your battle belt is everything you need to survive and absolutely nothing more. I’ll cover battle belts in a later article, but if you find yourself in a situation where you’re wearing your warbelt/battlebelt, then you’re definitely in a situation that could require a blowout kit. If you’re in the law enforcement or rescue world, you’ve got your own version of battle gear that you might choose to store it in.
Again, the idea here that I want to drive home is that you need this in a place where YOU can reach it while you’re bleeding out. You might not have help. There might not be a buddy there with you. This needs to be something you can grab and immediately dump out and make use of it’s components. Every one of us can scratch our butts with either hand. The good Lord made us that way. (If you’re still not sure why this is a good place, you’ll learn that in a bit if you keep reading.)
WHY NOT JUST CARRY AN IFAK? (Or what does that even mean?)
If you’re new to prepping (Yeah I know some people hate that word) or you’re new to rigging a tactical loadout, some of these terms might still be new. An IFAK is the acronym for an Individual First Aid Kit, and that’s just what that tool is for. If your doctor needs to bandage your booboo, he might reach into an IFAK. If he needs to perform a surgical procedure to remove a bullet, he’s not using the same tools, right? The same is true for you in your life.
An IFAK (and I’ll do an article on those too) contains all the things you would need for first-aid. They usually includes, bandages, splints, tourniquet maybe, painkillers, antihistamines, would cleaning materials, suture, etc. Notice what all those things have in common? You’re not dying while reaching for them…
A blowout kit is what we call purpose-built for one thing and one thing only. Your first aid kit might have trauma shears in it, but your blowout kit needs its own set. Your first aid probably does NOT contains hemostatic gauze or Israeli battle dressing, but your blowout kit should! They are different tools for a different purpose.
BUY ONE OR MAKE ONE?
Police, EMTs, Rescue Workers, Wildlife Officers, Hikers, Shooters, all these people need blowout kits but depending on their budgets or department’s budgets, they either get sub-par ones or they get really really nice ones they have no idea how to use and have never even bothered to open.
Some of us, especially preppers going through 2022 inflation, don’t want to spend $85 – $150 per kit to buy a premade kit.
I like to save a dollar when I can, but I also like the benefit of knowing your gear if you build your own. I’m going to show you how to purchase everything you need for a BKIT you can make yourself. You’re going to get three benefits from doing it that way.
- You save money over purchasing a pre-made system.
- YOU can be sure you’re getting quality components.
- You will KNOW what each thing is and why you have it and when to use it because you will have put it together.
If you made it yourself and you put it together, then YOU know exactly what is in it, and what to reach for when the need arises.
HOW TO MAKE YOUR OWN BLOWOUT KIT
I’m going to show you the tools I use in my own kits. I’m going to briefly detail each one of these items but I’m not going to go into huge detail on them. YouTube university will show you hundreds of videos on how to use each of these properly, as will a free First Aid course offered in your communities; something I’d always recommend!
Note: The links here are Amazon affiliate links. I will make a small commission off items purchased through these links. If you prefer to purchase them without giving me credit, just copy the amazon item number and enter it again yourself on Amazon. Same product, same price, but you aren’t contributing to my child’s college fund.
These items are listed in no particular order.
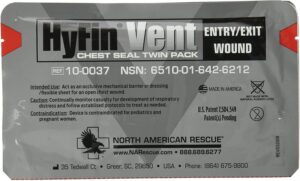
Makes 2 Kits
This is a chest seal and does exactly what it sounds like. Instructions are printed on the package. Open it, peel it off it’s backing, and slap it on the open hole in your chest. It literally just stops the blood from continuing to leave your body. Note: If you’re suffering from a gunshot or stab would, it might be a through-and-through, so having two of these in one kit isn’t a bad idea. I keep two in each of mine.
ISRAELI BATTLE DRESSING (COMPRESSION BANDAGE)
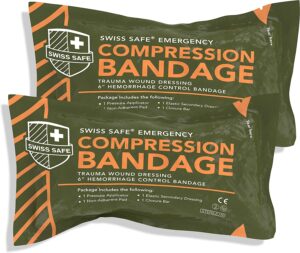
Makes 2 Kits
Israeli Battle Dressings are also called compression bandages. They are designed for two purposes. First, they are a pressure applicator; you put them over a wound and wrap them around the wound tight to apply pressure and stop blood flow.
Secondly, they can be used as a “light” tourniquet – by using the included bar to reverse the wrap and pull the wound closed ( picture an open leg laceration that needs to be closed up prior to transport).
In addition to your BKIT, these are also must-haves in my opinion for a trauma bag and IFAK.
Example Video 1, Example Video 2
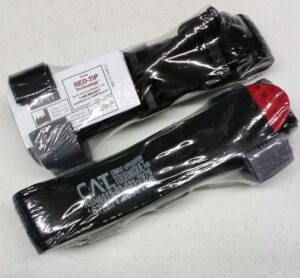
Makes 2 Kits
This is one of those tools you do NOT mess around with. If you need a tourniquet, there’s a good chance you know you’re bleeding out. You might not be awake in 3 minutes to monitor the status of the cheap knock-off junk one you purchased that broke apart under strain and left you bleeding from the femoral artery. This one shown in my link is provided by North American Rescue, a tried and true American distributor you can trust to have genuine products.
NOTE: If you’re going to include a tourniquet, also include a SHARPIE marker. Get one of the smaller ones for space considerations. This is solely for marking the time you applied the tourniquet so the hospital knows this information. This is critical information they will need.
QuikClot (or Celox) Hemostat Dressing
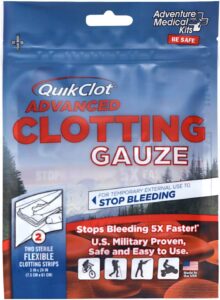
Makes 1 Kit
This is amazing stuff, but if you have to use it, someone’s day has gone horribly wrong. The materials you’ve seen so far are mostly topical solutions. Close the wound up, pull it tight, seal it with chest seal, or stop the flow with a tourniquet. QuikClot is for when that isn’t an option.
QuikClot is gauze that is infused with Kaolin, an ingredient that puts the body’s clotting ability into overdrive. It’s used when you have a massively open wound and you absolutely need the bleeding to stop.
I’d suggest watching the video link below. Please be aware it’s a “real” wound repair, but not on a human. Some people might be sensitive to the first video. The second is is more kid-friendly.
Example Video 1, Example Video 2
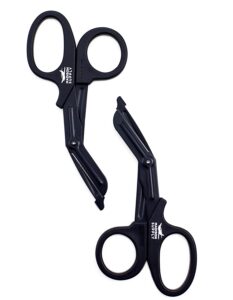
Medical Trauma Shears
Makes 2 Kits
There’s nothing special about trauma shears except for the tip. Notice they have a flat tip? That flat spade is designed to allow you to push them under a shirt, or pants, and cut the clothing without stabbing the patient (or yourself) in the process. Can you get away with scissors? Yes. Should you? No. A good pair of trauma shears isn’t an expensive item. This two pack is $20 at the time of publishing.
Nasopharyngeal Airway (With Lube!)

Makes 1 Kit
This is one of those tools that falls under the idea that you know what you’re doing. If you aren’t skilled in use of an NPA airway, don’t try using it on someone. There are contraindications to be on the look out for and if you use it incorrectly you can cause the patient to regurgitate and possibly choke, and let’s be honest, they’re already having a bad enough day without you doing that to them. If you don’t know how to use one, consider leaving this one out. (Then again, it might be YOU it’s used on, so you might want one handy).
NOTE: An airway kit comes in multiple sizes, just like people. This 9.3mm tube is the most common for adults, however you need one sized for yourself. Do NOT use an incorrectly sized airway on a patient. For quick reference, the size of the tube itself should be approximately the same size as the patient’s pinky finger. Be SURE of what you are purchasing.
14 GAUGE CATHETER NEEDLE (for decompression of a chest wound)
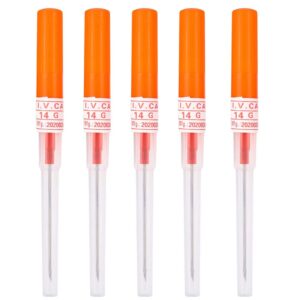
Makes 5 Kits
This is for treating tension pneumothorax (pressure from a ruptured lung inside the chest). This is one of those things you hope you never have to do, but a very affordable $2 catheter needle can fill the need in a pinch.
Note: Definitely watch this video.
NITRILE GLOVES
I’m not including pictures or links of gloves because you should already have these floating around. If you have a ziploc bag, I would suggest putting two pair of nitrile gloves inside a ziploc bag and sealing them up with your equipment. You do NOT wanting to be putting dirty hands inside an open wound, both for the patients health and potentially your own.
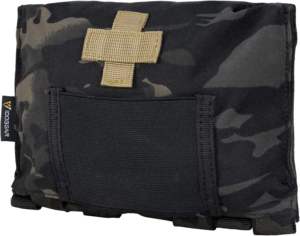
Now we bring this all together and try to make it make sense for you.
What you’re seeing here is a pouch. Big deal, right? Well, it kinda is actually. A blowout pouch is made with a few specific things in mind.
It’s as small as physically possible to do the job it needs to do. Keep in mind this is probably strapped to your rear end, so you’ll be wearing kit all day and you’ll be leaning back on it, driving with it maybe if conditions warrant, etc.
In a gunfight situation, if you’re crawling facedown towards or away from incoming fire, you want as little of yourself sticking up as possible. If you have to crawl through small spaces, you want as little of you sticking out as possible. You ALWAYS want as little of yourself visible as possible if you’re in a hostile situation.
The most important part of this design is its function. It’s designed to be “ripped away” by either yourself of someone else with one hand, yet stay in place until needed. It’s also designed to be ripped open.
Watch the video below for instructions on how to open up a blowout kit for use. This guy does a pretty good job of detailing how to access the pouch.
Some final notes on your blowout kit
Space is at a premium if you’re wearing this kit on your battle belt, your plate carrier, your rig, or anywhere on your body. You want as much life-saving equipment as possible, but you want is as compressed as possible. Most of the bandages and such are already going to arrive vacuum sealed to reduce space. Consider vacuum sealing anything you can to knock space down further.
Keep your comfort in mind. If it were me, my tourniquet goes in first (which would be the top when I’m fully packed and wearing it). The shears go in the middle, surrounded by battle dressing, QuikClot, and other materials so that I’m not feeling them poke me in the rear or having them leave marks on my truck seat.
If you have absolutely any questions or comments about the blowout kit, feel free to use the contact me page and ask!
Remember to share the site if you find it useful, and consider joining my mailing list. I’ll only send out updates when I post new articles and content. I hate spam, so I’m not spamming my viewers!